
Background
Auditing is a key process in many companies, but it can be slow and full of mistakes when done by hand. This case study looks at how the Auditing File Management Application (AFMA) helped solve those problems and made audits faster and easier.
The Problem of Difficulties in Audit without Application:
Before using the AFMA system, the company had these problems:
Auditing without an application can be tough because it means collecting and checking data by hand from different sources. This takes a lot of time and can lead to mistakes, especially when tracking changes in multiple documents. Without automated checks, it’s easy to miss small errors. Creating reports and summarizing the audit also becomes harder, especially when there’s a lot of data. Following audit rules can be tricky too without reminders or built-in steps to make sure everything is done correctly.
- Manual Data Entry: Auditors had to enter data by hand, which led to mistakes and missing information.
- Hard to Work Together: Team members had trouble sharing information and working together in real-time.
- Slow Reports: It took too long to create reports, and they weren’t always accurate.
- Compliance Issues: It was hard to track and follow rules properly.
- Security Risks: Sensitive data was stored in files and spreadsheets, which could be lost or stolen.
The Solution of Benefits: Auditing File Management Application
To fix these problems, the company used the Auditing File Management Application. Key features include:
Using a web application for auditing makes the process faster and more accurate. It helps collect and check data automatically, reducing mistakes. The application can track changes in real time, so you always have the most up-to-date information. Generating reports is quicker because the app can put everything together for you. It also helps make sure you follow all the required steps and rules. Overall, it saves time, reduces errors, and makes auditing easier and more reliable.
- Centralized Data: All data is stored in one secure place, making it easy to find and update.
- Real-Time Collaboration: Teams can work together easily, with real-time updates and secure access.
- Automated Reports: The application creates reports quickly and accurately.
- Better Security and Compliance: It keeps track of all actions, ensuring the company follows all rules and regulations.
- Scalable: The system can grow with the company’s needs.
User flow with a short description for each module and Screen:
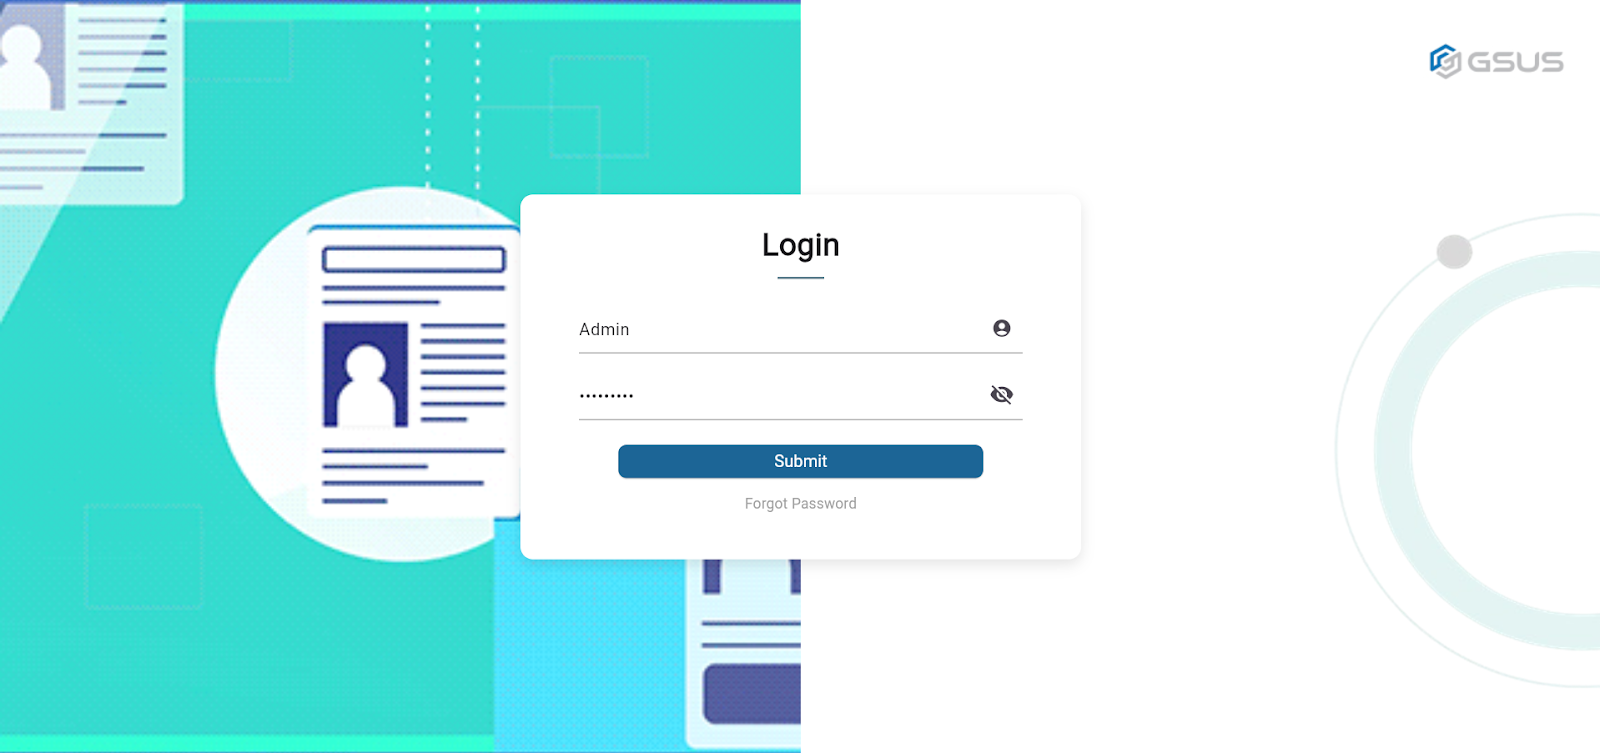
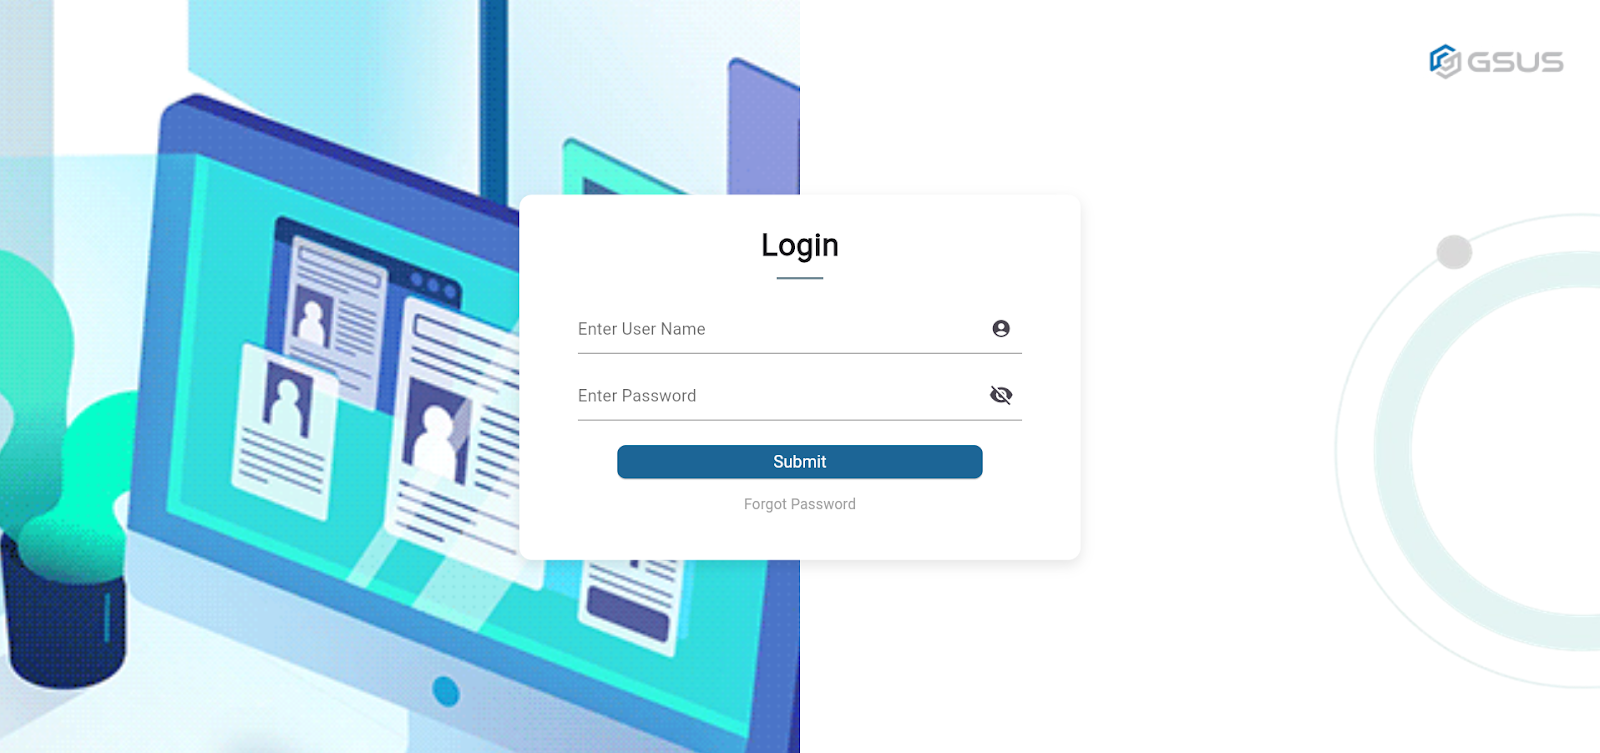
Admin Login:
Log in by entering your username and password. If you forgot your password, click “Forgot Password.” A verification code will be sent to your registered email. Use it to reset your password.
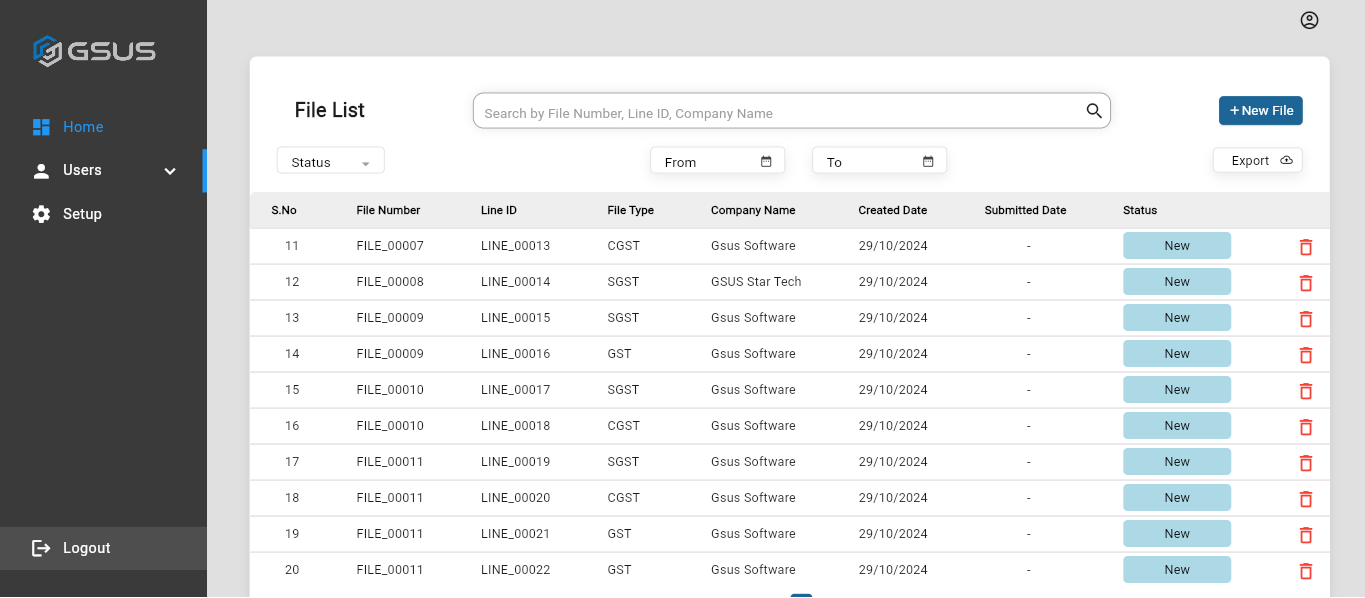
Admin File List:
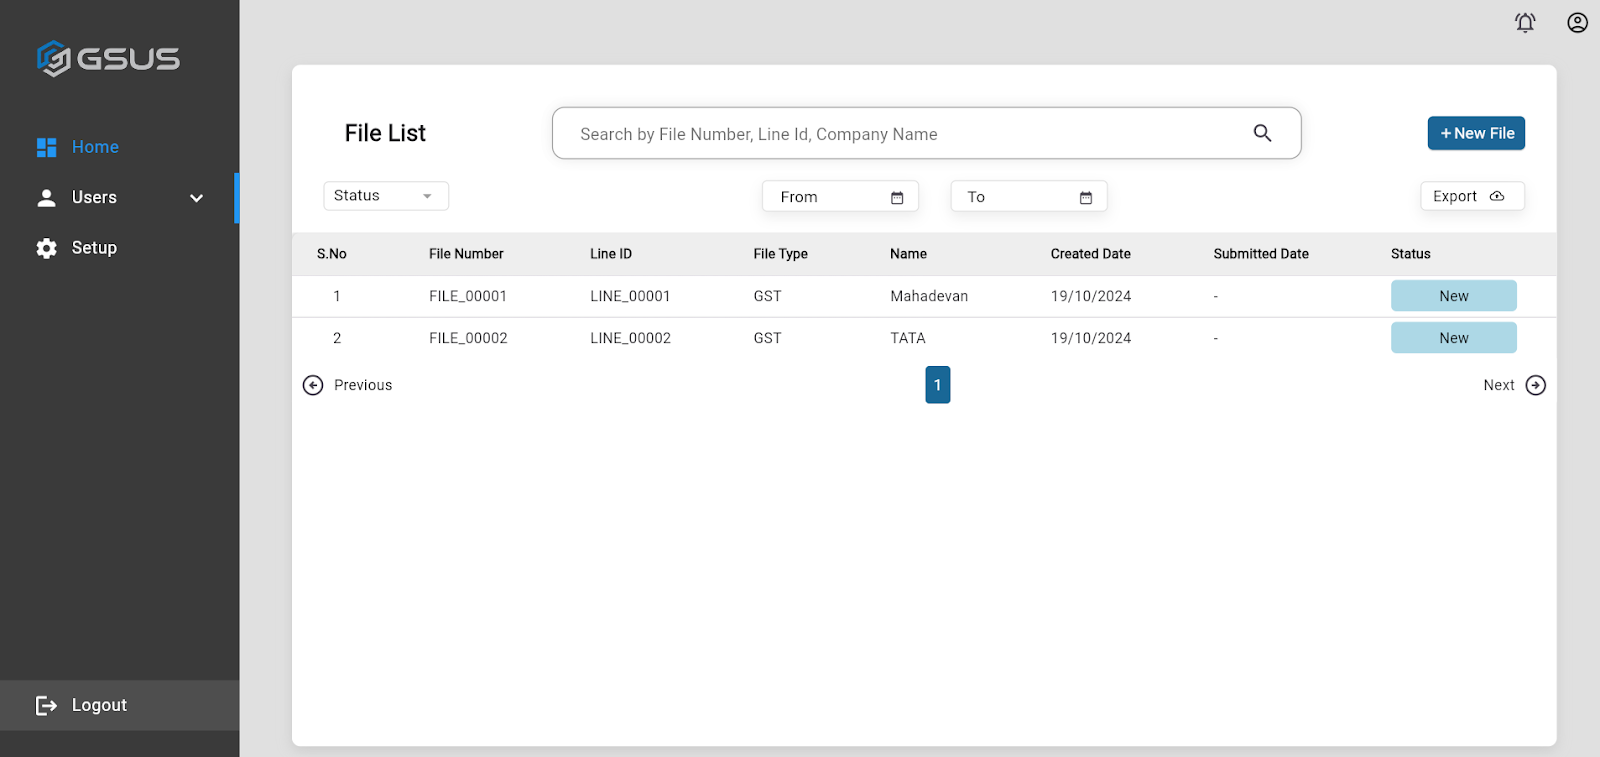
Create New File: Click the +New File button on the File List page. The system should navigate to the Add New File form page
Delete Button: Using the “Delete” icon the system should be deleting the file ID in customer details.
Export and Download Files: Filters allow the receptionist to apply a date range or other criteria and download files accordingly. Clicking the Export button should export the file list in the correct format (PDF).
Status Update: The system will dynamically update file statuses based on employee actions.
Search options: The user enters the valid File number, Line ID, and Company name, and the system should display of particular file.
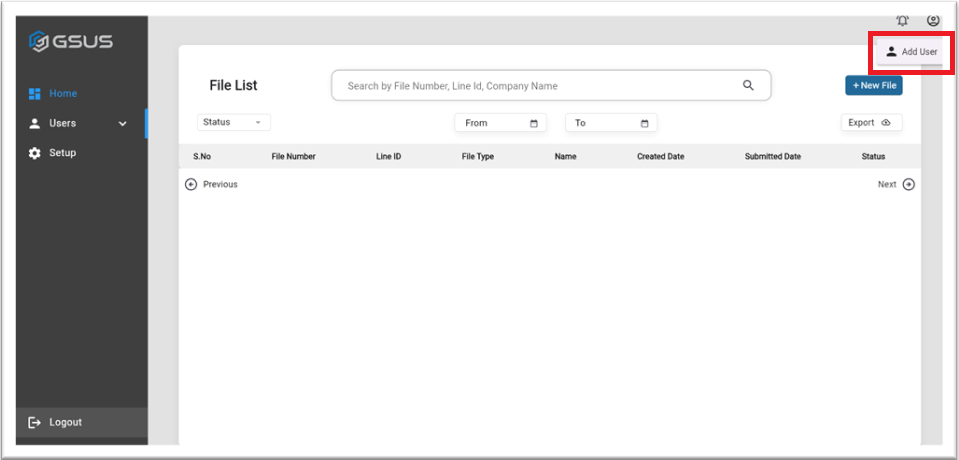
Admin File List Screen: Add User
After logging in, the admin can view a list of files and click the profile icon to use the “Add User” option to create a new employee or admin.
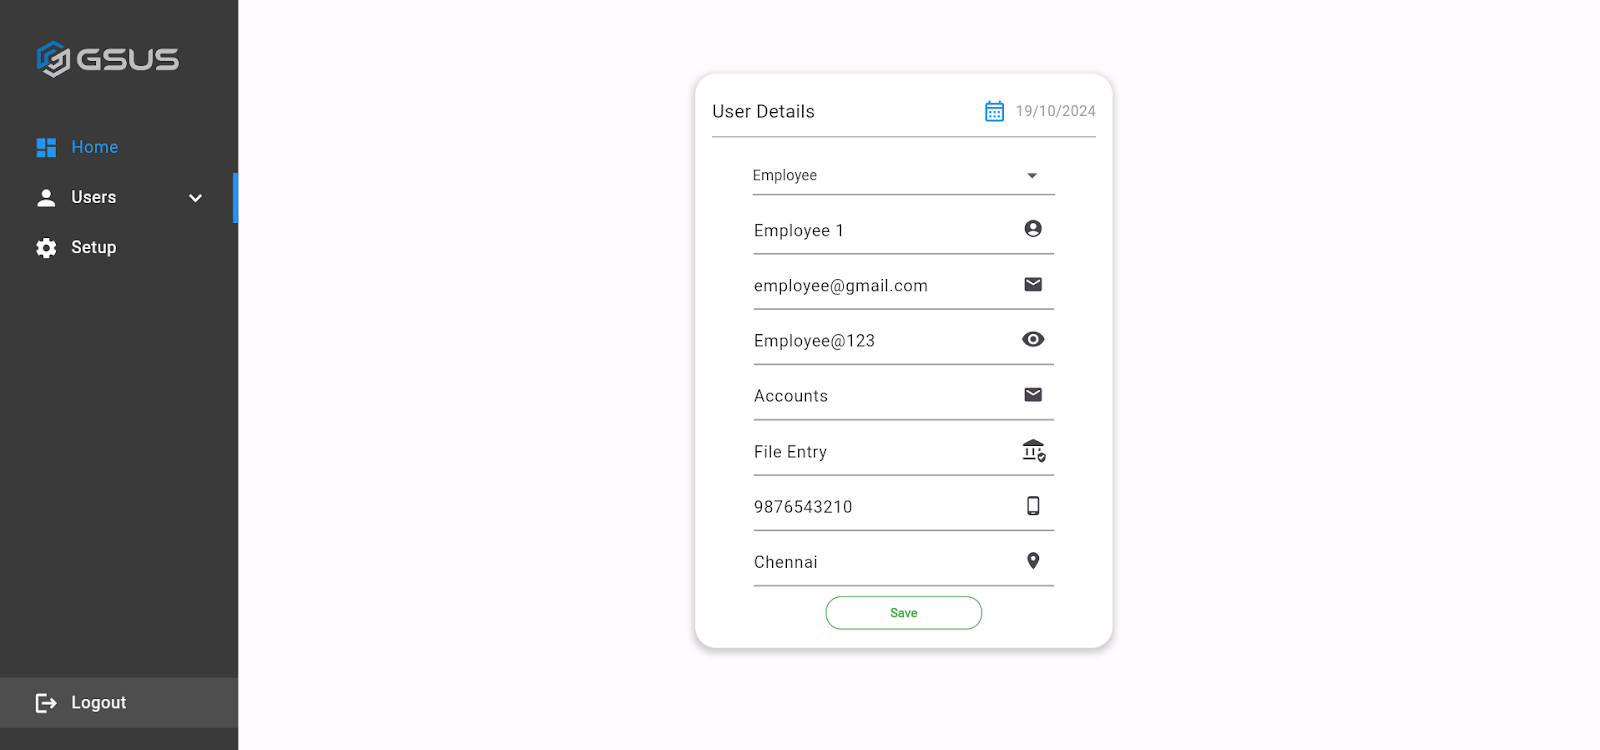
Admin File List Screen: Add User: Create Admin/Employee
After Click “Add User,” fill in all necessary details, and click the save button. The new user will receive an email with login credentials.
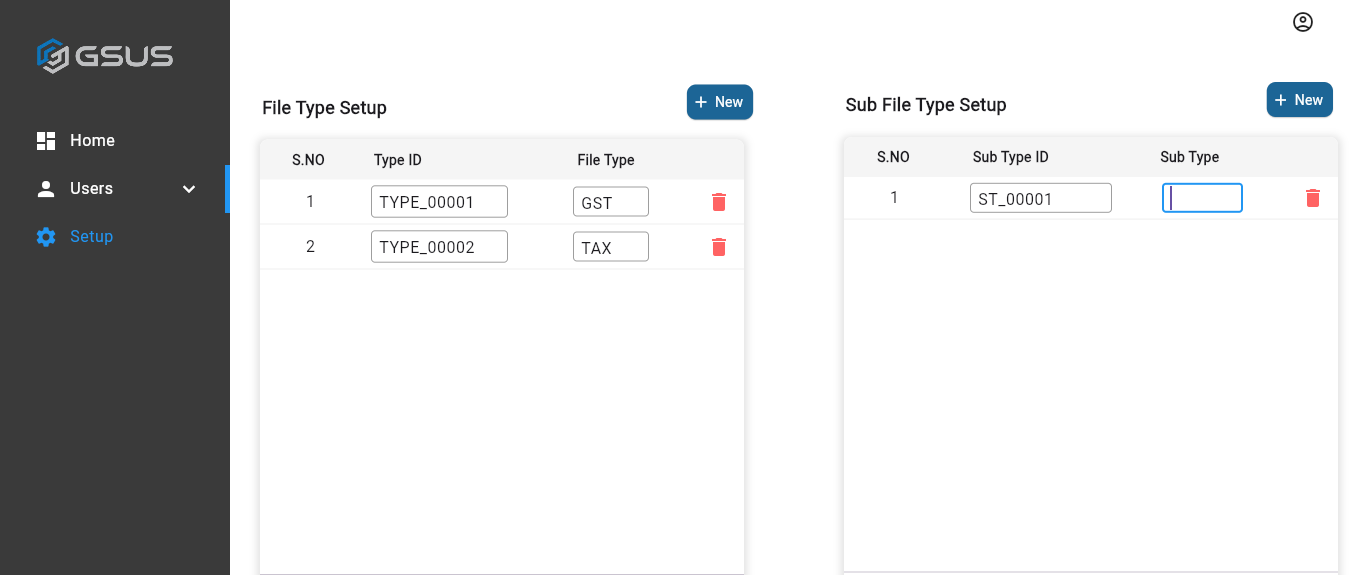
Setup Screen:
The setup screen uses the file type setup and sub-file setup. Admins can add, edit, or delete file types from this screen.
Create New File Flow:
Click the +New File button on the File List page. The system should navigate to the Add New File form page.
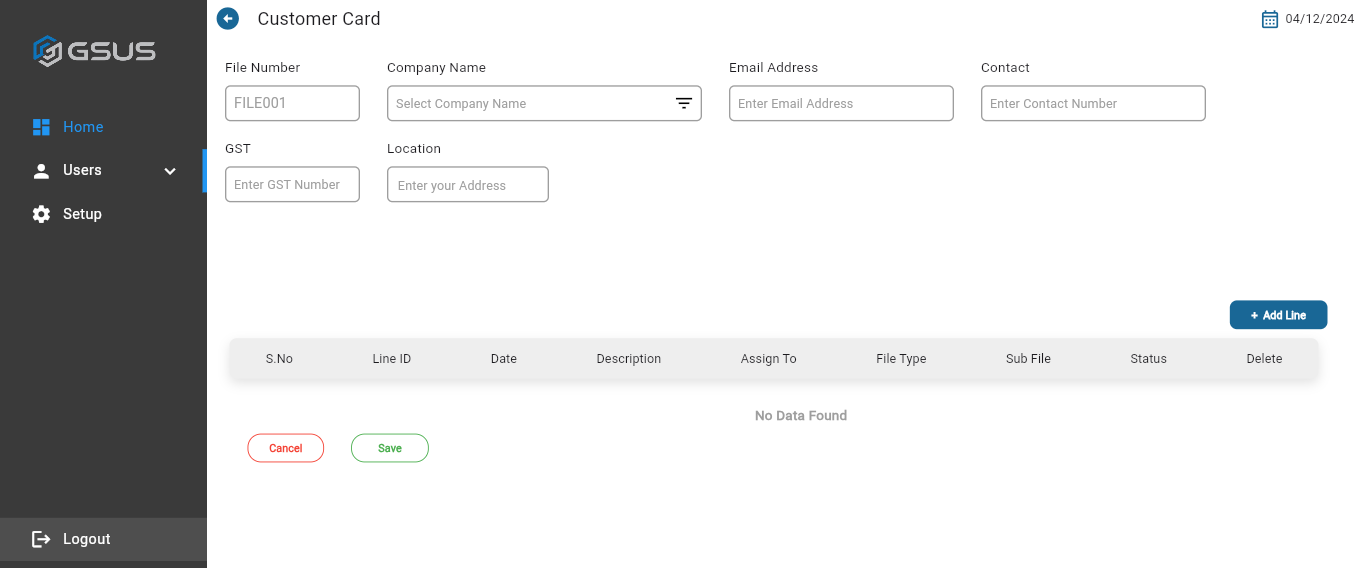
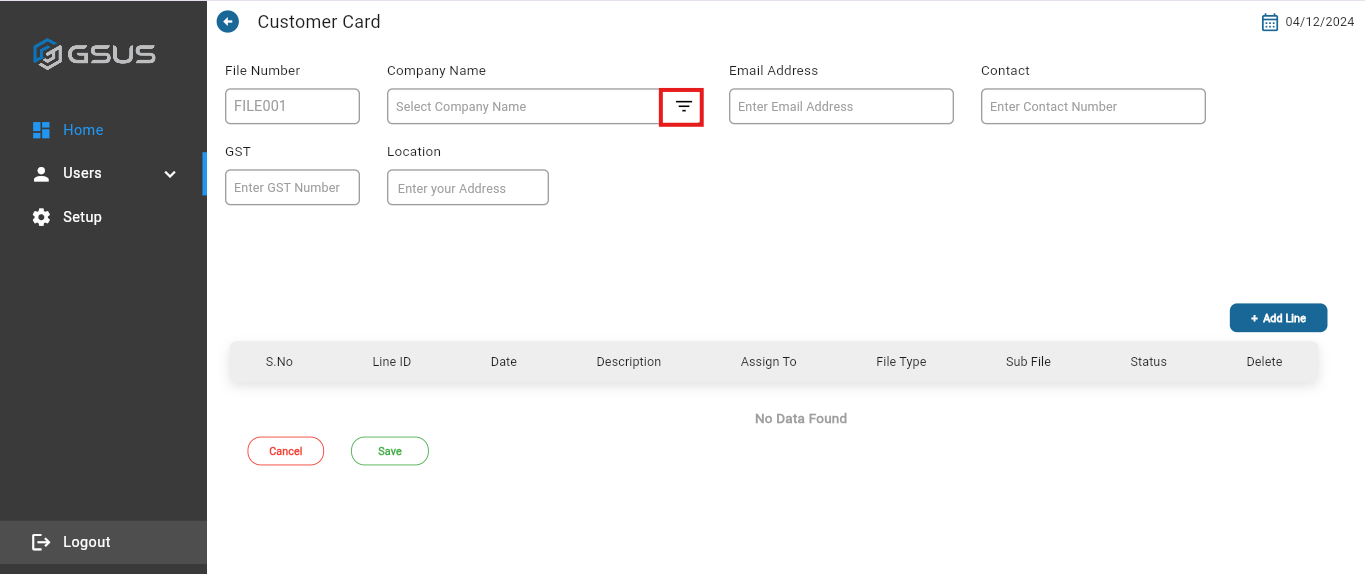
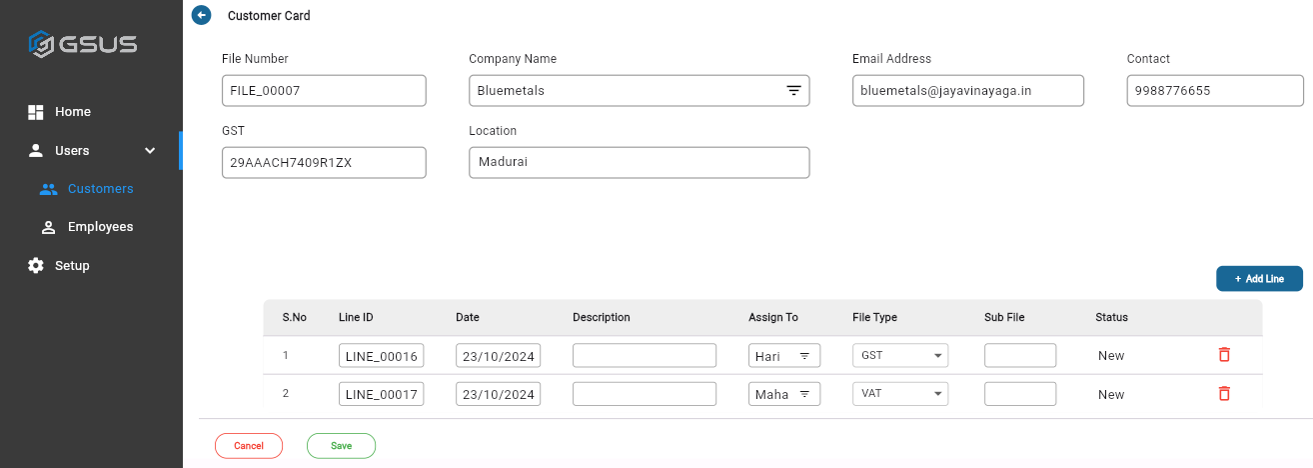
The system should accept the file number (e.g., FILE_00001) without any errors. The file number is generated automatically (editable if needed, but duplicates are not allowed). Use the lookup icon to select a customer from the overall customer list.
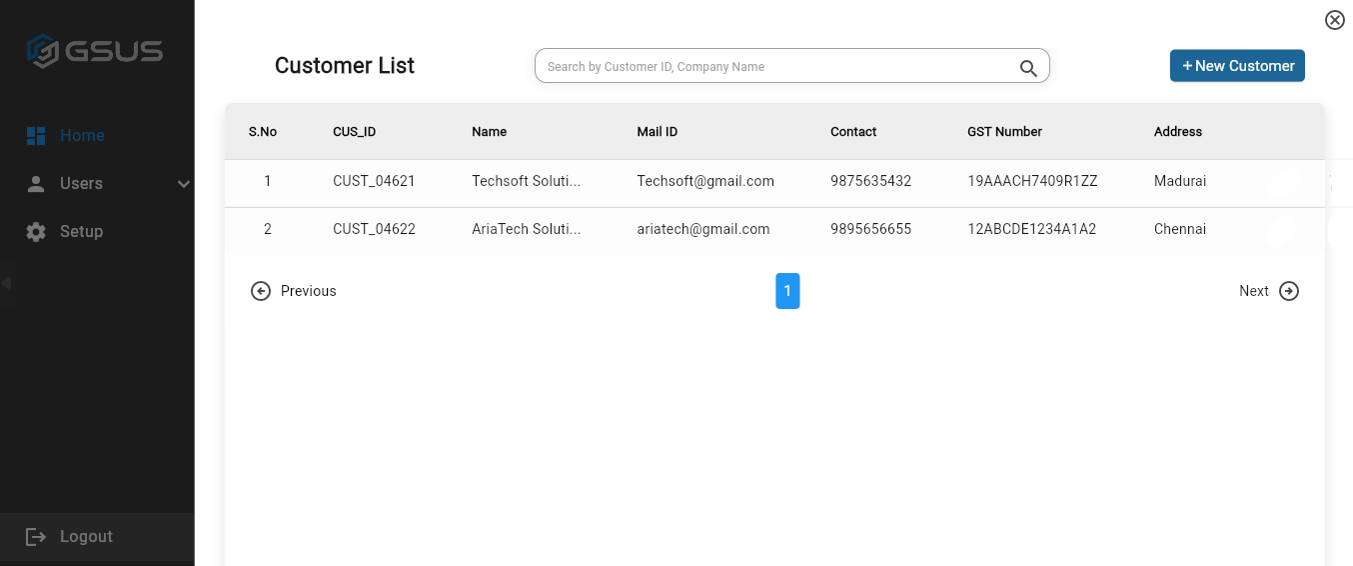
Customer List Screen
Create New File
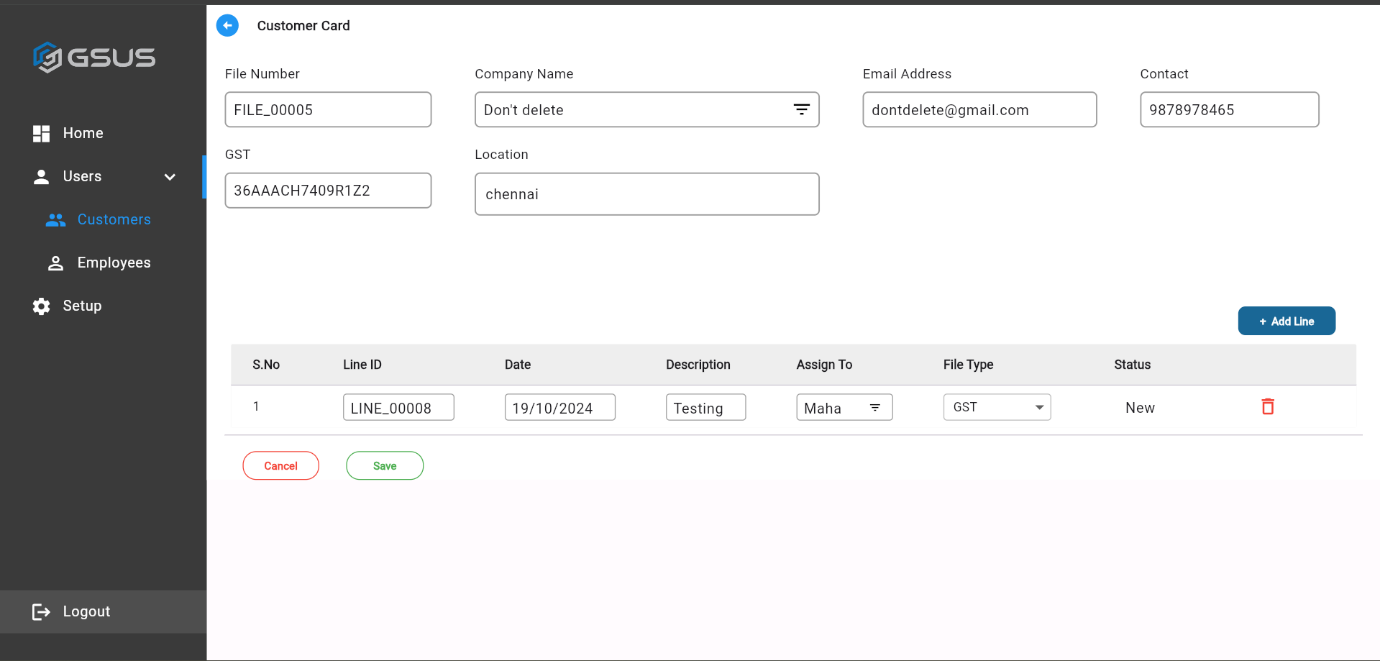
After adding a customer, select them from the customer list. Click the “Add Line” button to create a new line item. A Line ID and the current date will be generated automatically. Enter the description comments, select an employee from the employee list using the lookup option, choose the file type, and select a sub-file from the dropdowns. The line item will automatically be set to “New” status.
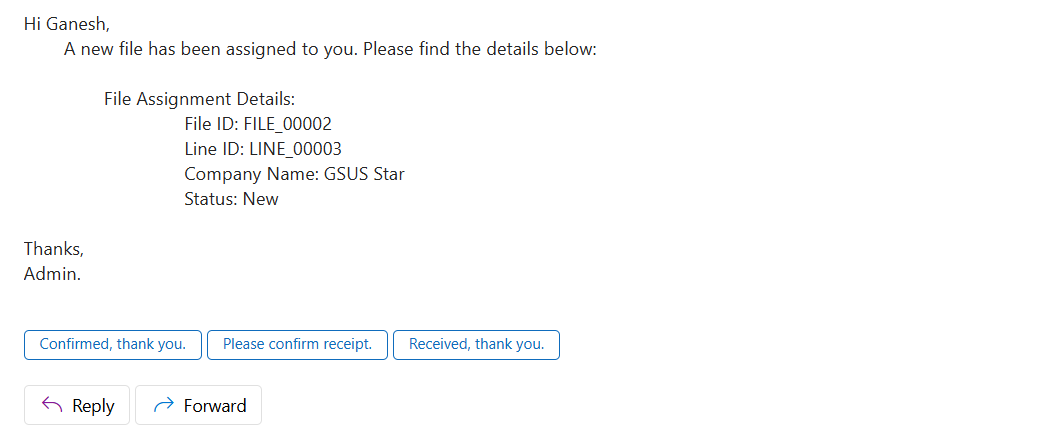
Once assigned, the employee will receive an email notification and can view the file request on their screen.
After the file is created, it will appear on the admin home screen with its details and status.
Once the employee completes the customer file, the admin will update the status from “Completed” to “Dispatched”. After the status is changed to “Completed” or “Dispatched,” the file cannot be deleted.
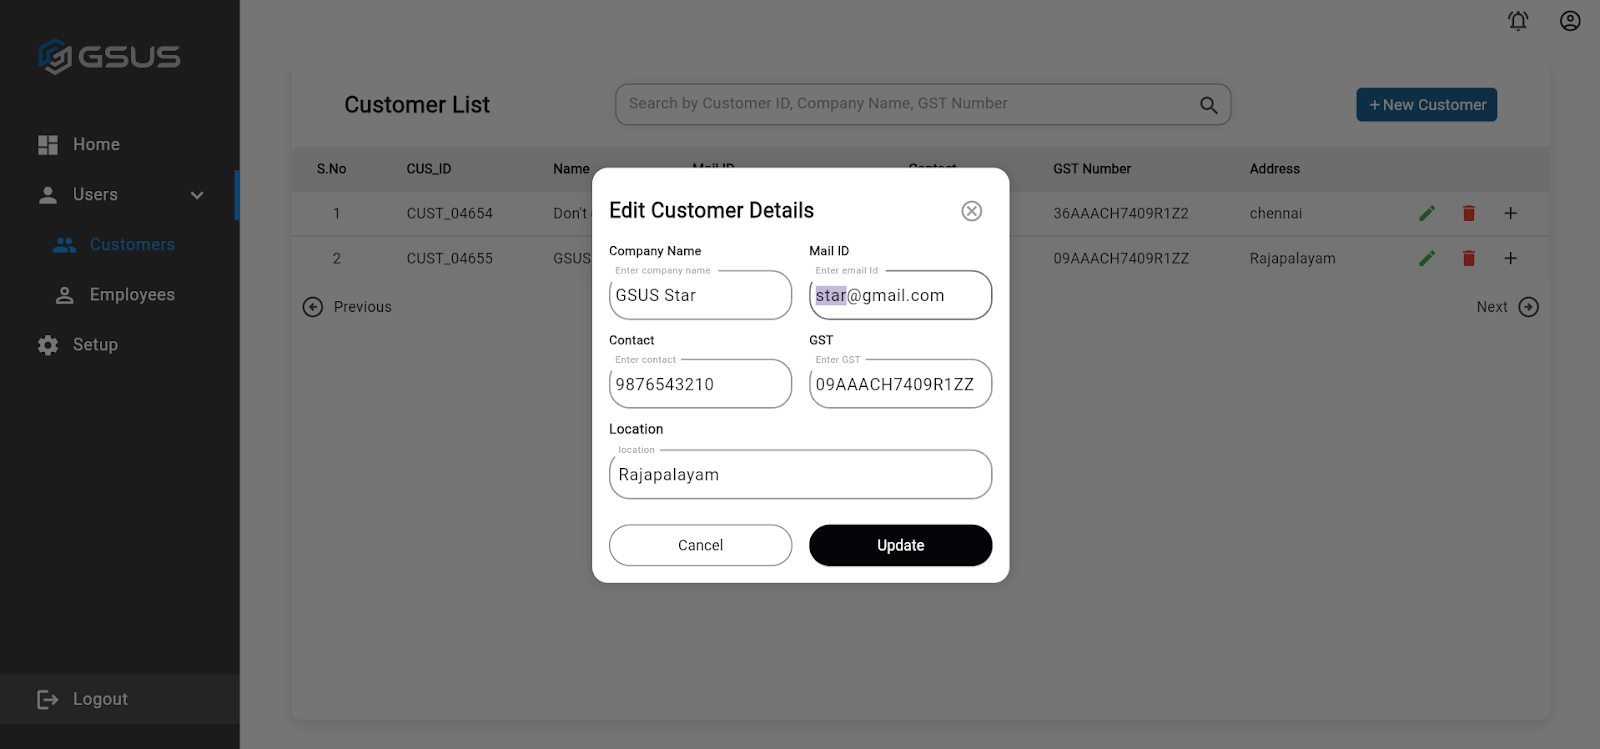
Editing Customer Details
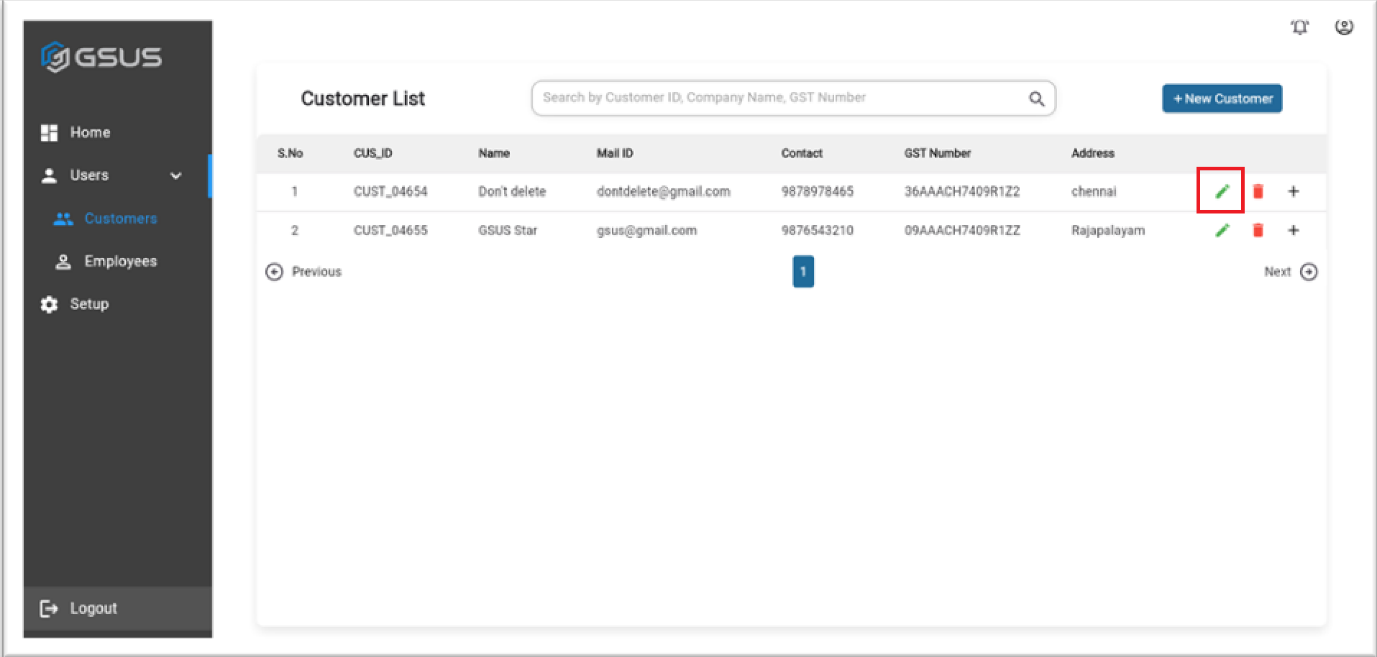
Click the edit icon to update customer information.
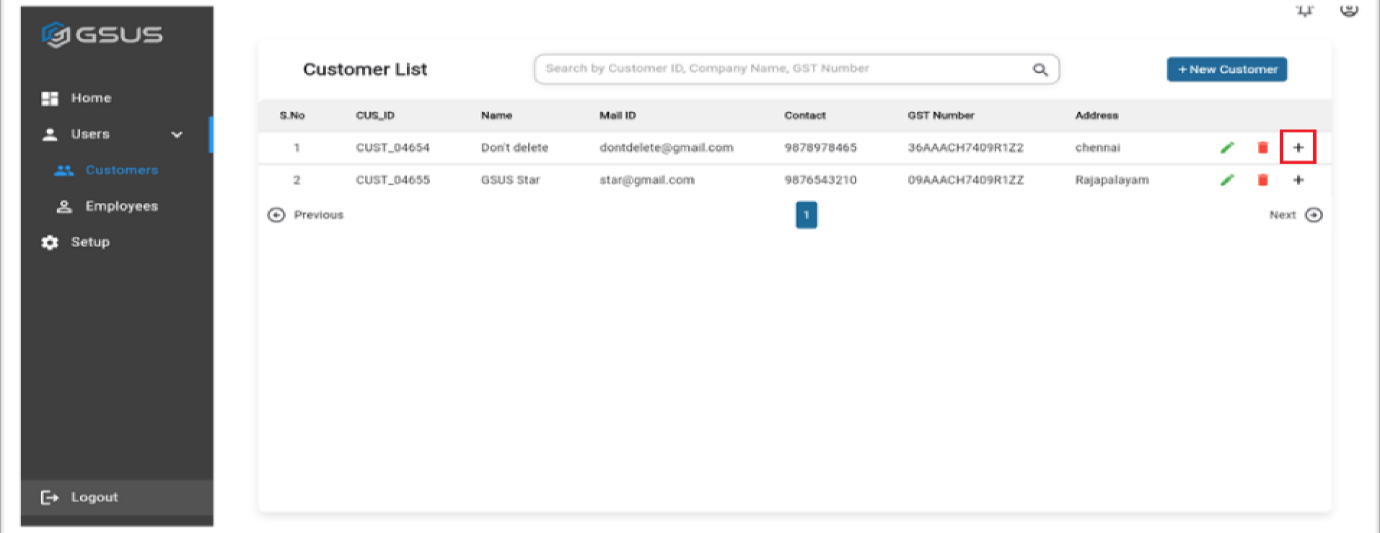
Viewing & Editing Files for a Customer
Click the “+” icon to expand customer details and view all file records for that specific customer.
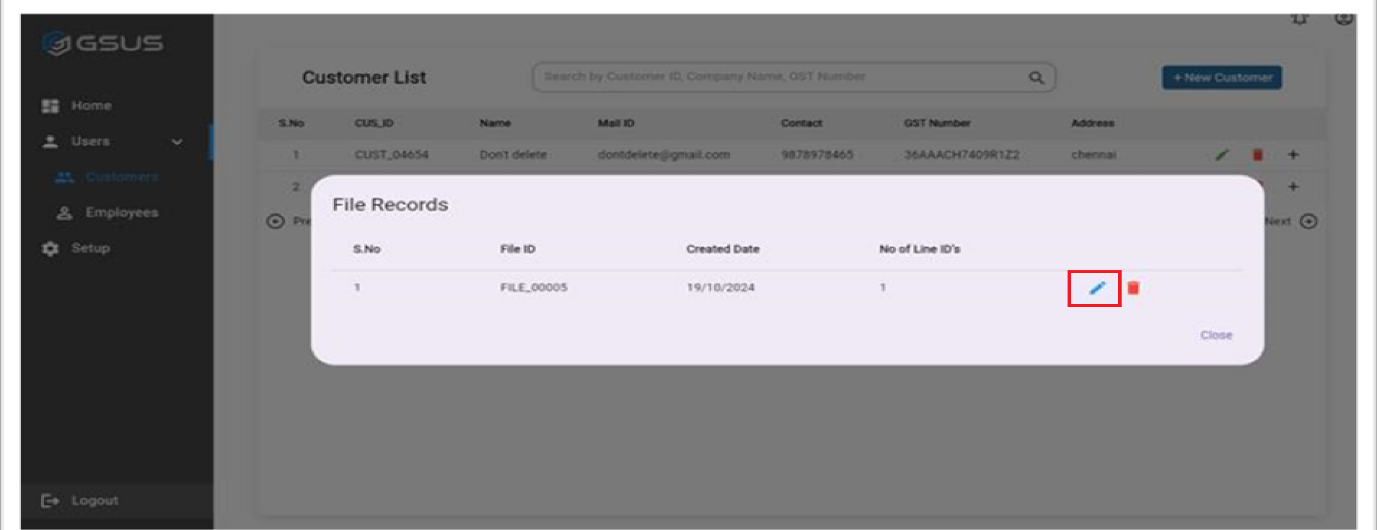
To edit existing files, click the edit icon next to a file. Admins can edit customer files, reassign the employees, and file types, update descriptions, or delete a line if needed. Employees can only be reassigned if the file status is “New.”
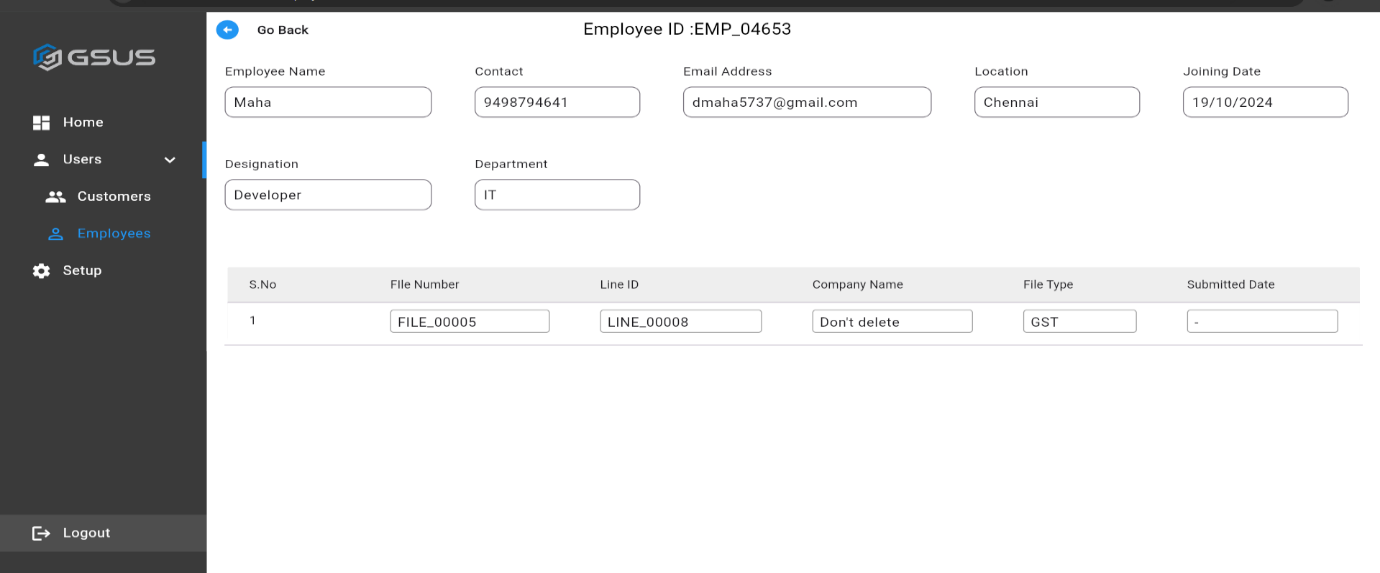
Viewing Employee List
The admin can view employees on the overall employee screen. Click the Eye icon to see the details of a specific employee.
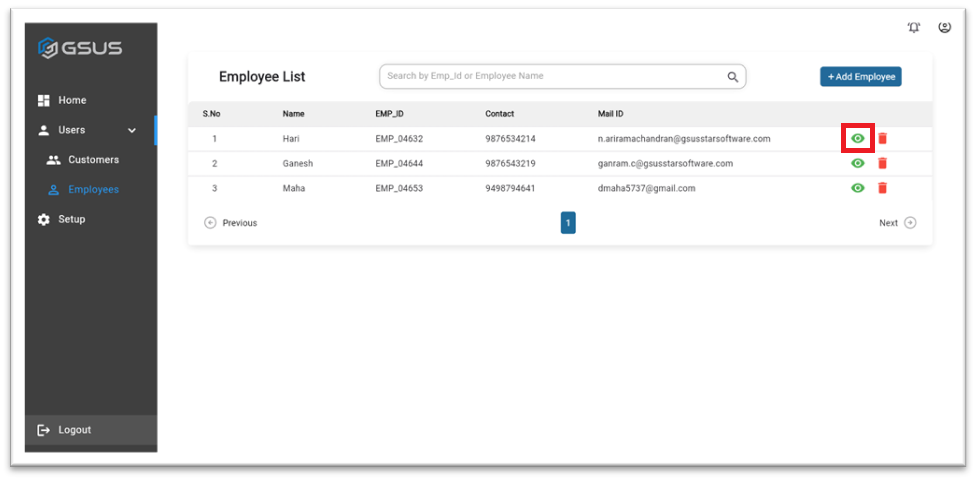
Viewing Employee Records
The admin can view employees on the overall employee screen. Click the Eye icon to see the details of a specific employee and their individual file records.
Role: Employee
Employee Log In:
Log in by entering your username and password. If you forgot your password, click “Forgot Password.” A verification code will be sent to your registered email. Use it to reset your password.
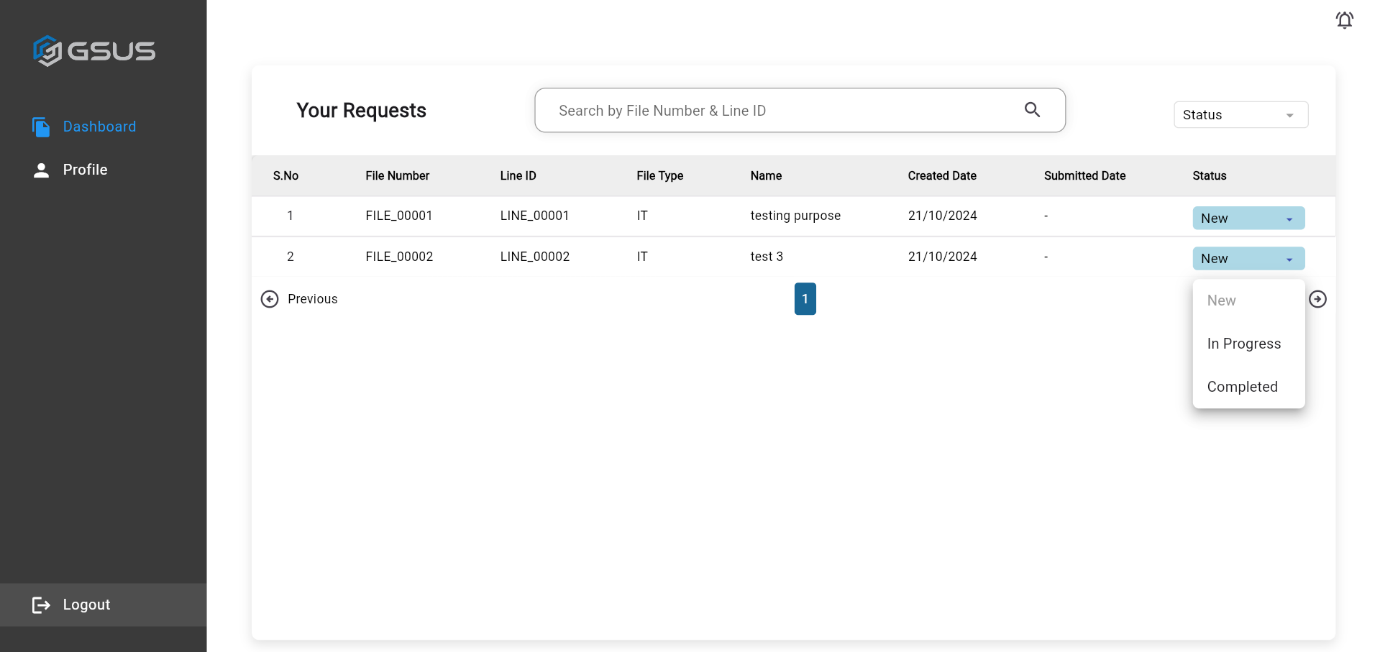
Assigned Files
Employees can view assigned files with the status “New” and update the status to “In Progress” or “Completed” using the dropdown. The admin’s screen will automatically update with each status change.
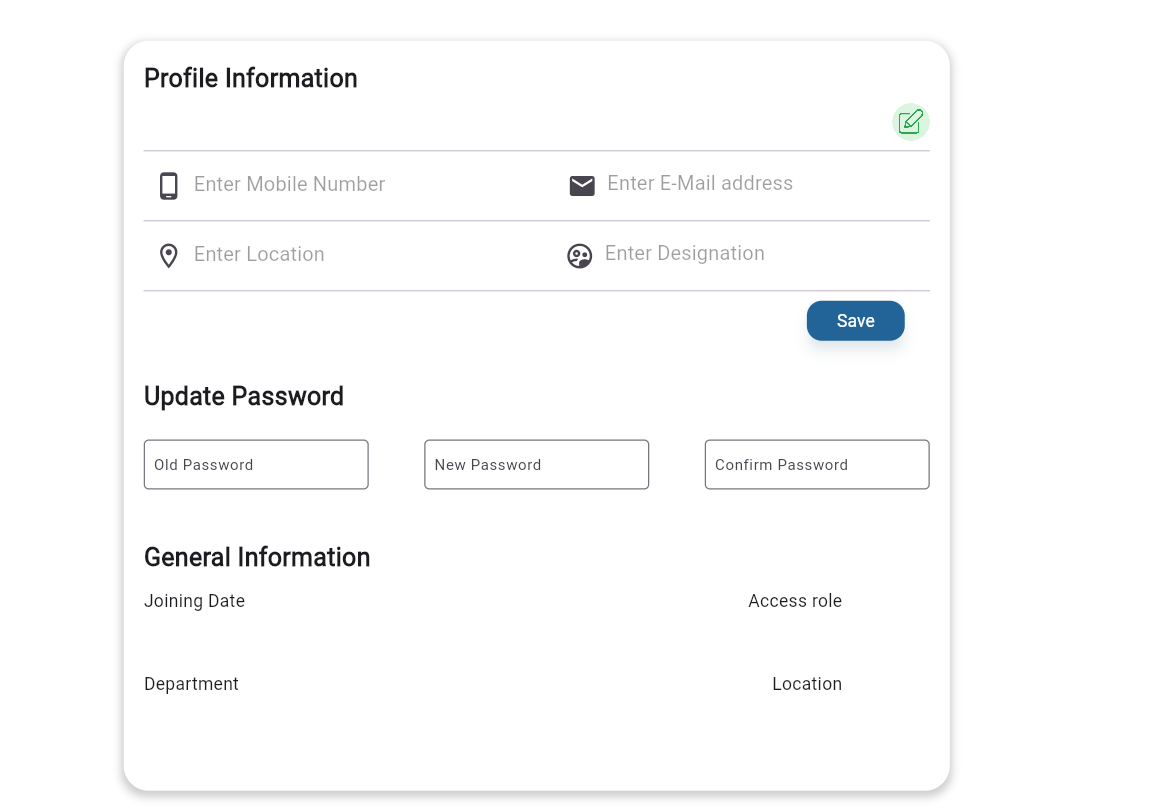
Profile Management
Click the employee profile in the menu bar to go to the employee profile page. Click the edit icon to modify employee details, then click the save button to update personal information. To change the password, use the update password fields. Employees can view and update their personal details from their profile page.
Conclusion
The Auditing File Management Application helped the company streamline its audit process, saving time, reducing mistakes, and improving collaboration. This case study shows how technology can solve common problems in auditing and make processes more efficient.